
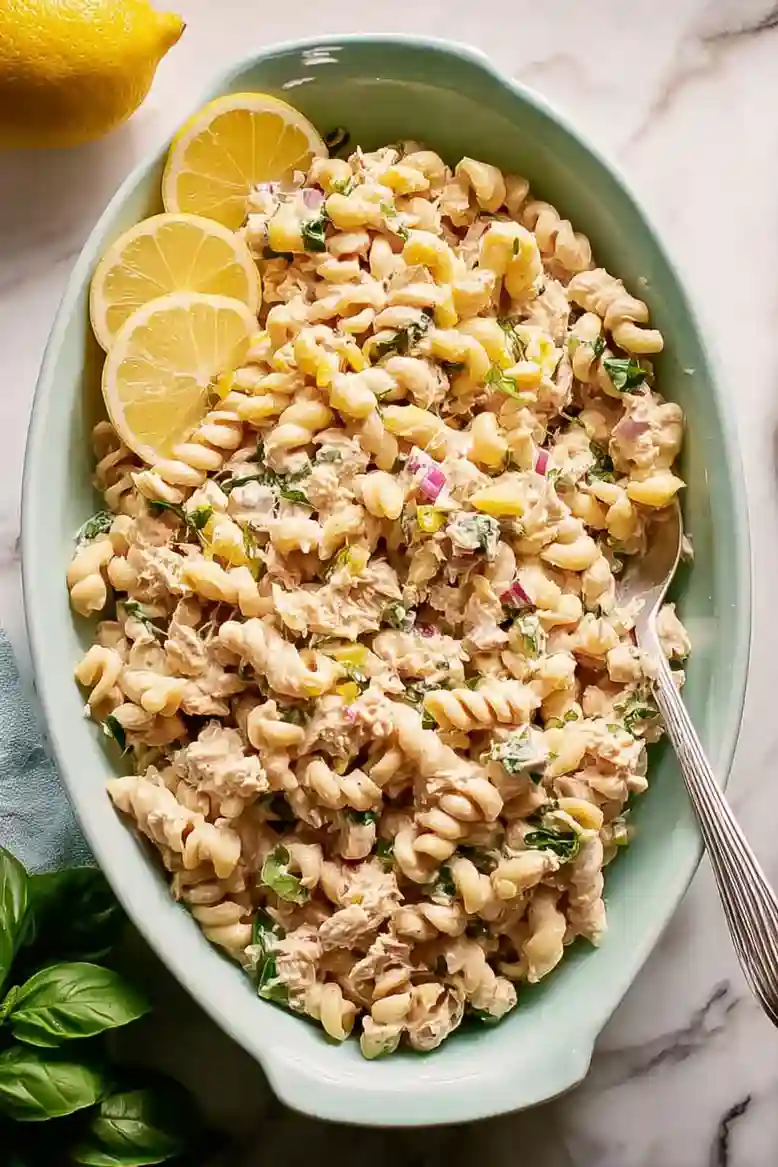
I’m excited to share my white bean tuna pasta salad recipe! This dish is a fun twist on traditional pasta salad. It’s creamy, zesty, and perfect for any occasion, whether you’re serving dinner or just need a quick meal.
This recipe addresses blandness, reduces heaviness from creamy dressings, and prevents pasta salads from becoming gluey in the fridge.
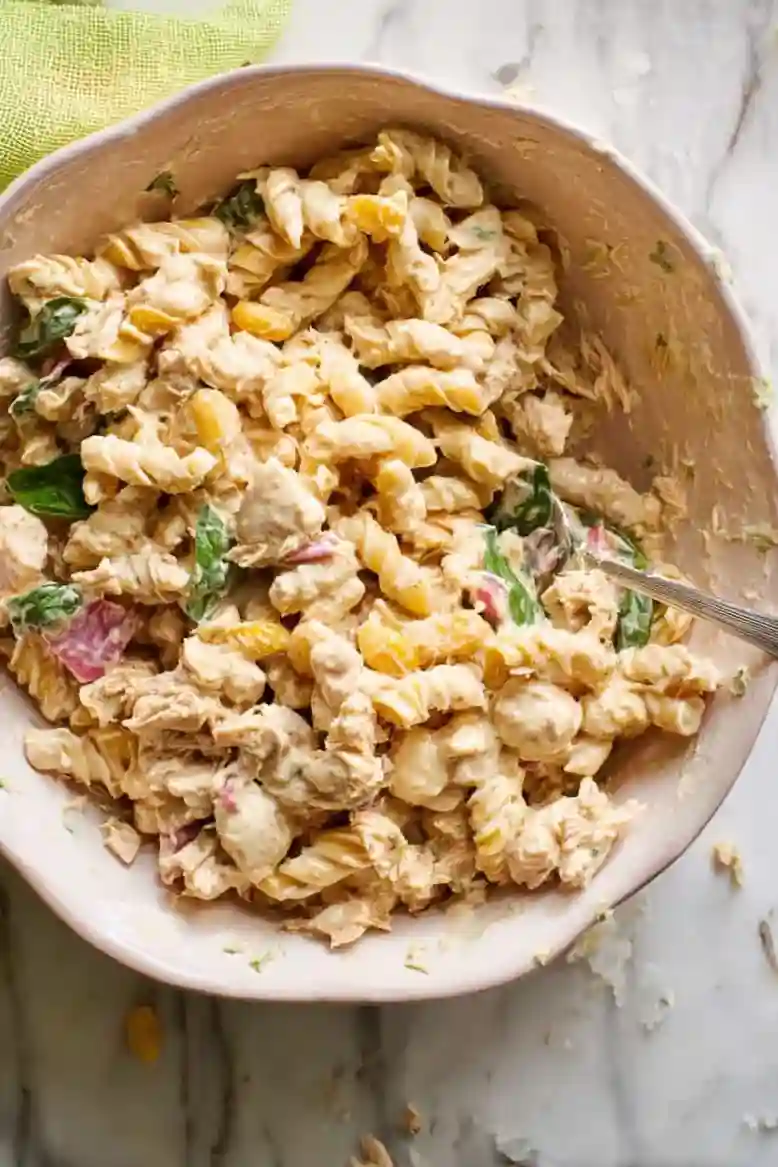
I know how frustrating it can be to whip up a pasta salad only for it to taste bland or too heavy with dressings. This recipe solves that problem by using Greek yogurt for a lighter touch and adding bright flavors to keep things interesting. Plus, it packs in the protein with tuna and white beans, which is great for staying satisfied.
What I love about this salad is how easy it is to prepare. In about 25 minutes, you can have a tasty dish ready to go! It stays fresh in the fridge, so you can meal prep and enjoy it all week long without worrying about it getting gluey.
If you love pasta salads, you’ll want to give this one a try. If you need another refreshing option, Refreshing Caprese Pasta Salad is a fantastic choice too!
Why You Will Love This Recipe
- Flavor Burst , The combination of zesty lemon and tangy Greek yogurt gives this salad a bright and light flavor that’s anything but bland.
- Happy Texture , With creamy beans and tender pasta, this salad offers a satisfying mouthfeel without being heavy, making it a real delight.
- Meal Prep Friendly , It stores well in an airtight container for up to three days, making it a convenient choice for quick lunches or easy dinners.
- Protein Power , The addition of tuna and beans means you’re getting a boost of protein, keeping you feeling full and energized.
Ingredient Notes
- Canned tuna: This is the star of the show! I like to go for light tuna in water or oil for a bit of richness. Oil-packed tuna can make it even creamier!
- Cannellini beans: They add a nice creaminess and a little heartiness to the salad. Rinse them well to keep the flavors fresh and bright.
- Pasta: I usually grab rotini or fusilli for this because the shapes really hold onto the dressing. Just make sure it’s well rinsed so it doesn’t get sticky!
- Mayonnaise: This brings a rich and creamy texture. I often lean toward a light mayo to keep things balanced, but full-fat works great too!
- Plain Greek yogurt: This gives a lovely tang and creaminess. You could swap it with regular yogurt if that’s what you have, but it won’t be quite as thick!
Keep scrolling to the recipe card below for the full printable recipe!
Recipe Tips
- If the salad dressing feels thick after refrigeration, a splash of lemon juice or olive oil can help loosen it right before serving.
- When your pasta salad seems bland, a bit more salt or an additional squeeze of lemon juice can brighten the flavors significantly.
- For a creamier salad, considering oil-packed tuna enhances moisture and adds richness to the final dish.
- If preparing ahead, letting the salad sit for a few hours or overnight can deepen the flavors and improve the overall taste.
- When selecting pasta, opting for shapes like rotini can help the dressing cling better, providing a more flavorful bite in every forkful.
Serving Suggestions
- Serve tuna pasta salad with crusty bread or a fresh green salad for added crunch. This dish also works well in a wrap or sandwich, making it versatile and practical.
- This salad can complement other meals, such as light lunches or summer barbecues. It is also a suitable option for potlucks and gatherings, appealing to a wide range of tastes.
- Add a drizzle of lemon juice or a tangy vinaigrette to enhance the flavors. Fresh herbs can also contribute to the overall freshness of the dish, rounding out the meal.
Storage Guidelines
- To keep your tuna pasta salad fresh, follow these storage tips:
- Refrigeration: Store in an airtight container in the refrigerator for up to 3 days. Keep it sealed for maximum freshness.
- Freezing: Wrap the salad tightly in plastic wrap or aluminum foil, then place in a freezer bag. Freeze for up to 2 months. Thaw in the refrigerator overnight before serving.
- Serving Safety: Always check for spoilage before consuming. Discard if any off odors or colors appear during storage.
Recipe Variations
- You can use canned salmon instead of tuna for a different seafood flavor.
- Add 1 teaspoon garlic powder or 1 tablespoon lemon juice for a zesty kick.
- Either substitute chickpeas for cannellini beans or use whole wheat pasta for added nutrition.
- If making a larger salad, double the recipe using 2 cans (14 oz) of tuna and 16 oz of pasta.
Did you make this recipe? Scroll down to leave a star rating and review!
Creamy Tuna Pasta Salad with White Beans

Equipment
- Mixing bowl
- Whisk
- Measuring cups
- Measuring spoons
- Airtight container
Ingredients
- ¼ cup fresh lemon juice (60ml)
- 1 lemon zest
- 1 clove garlic minced
- ¼ cup mayonnaise (60g)
- ½ cup plain Greek yogurt (120g)
- ¼ cup olive oil (60ml)
- ¼ tsp salt
- ¼ tsp black pepper
- 8 oz pasta cooked, rinsed, and drained (Brami lupini bean pasta recommended)
- ¼ cup red onion finely minced (40g)
- 1 can tuna (7 oz) (198g) drained
- 1 can cannellini beans (15.5 oz) (439g) drained and rinsed
- ½ cup fresh basil chiffonade (15g)
Instructions
- Start by whisking together lemon juice, lemon zest, minced garlic, mayonnaise, and Greek yogurt in a bowl. The mixture should become smooth and creamy, giving off a refreshing aroma. Ensure thorough mixing to avoid clumps.
- Slowly pour in the olive oil while continuing to whisk. This helps in achieving a silky dressing. Pour carefully to prevent an oily mess.
- Sprinkle in the salt and black pepper, and taste the mixture. The seasoning should enhance the flavors; adjust salt as needed, especially for sodium levels.
- Combine the cooked pasta into the creamy dressing, stirring until the pasta is fully coated. Aim for a shiny appearance as the dressing clings to the noodles.
- Gently fold in the minced red onion, tuna, and white beans, ensuring the textures and colors blend beautifully. Mix gently to avoid breaking up the tuna and beans.
- Stir in the chiffonade of fresh basil last for a burst of flavor and color. Add carefully to maintain the freshness of the basil.
- Cover the salad and let it chill in the fridge for about 15 minutes. This allows the flavors to mingle and the salad to cool. Avoid letting it sit too long to prevent flat flavors.
Leave a Reply